Building a step sequencer
In this third tutorial about scheduling, we will build a simple step sequencer. While we won't see much more new concepts or tools here, this tutorial will show you how many of the things we have seen so far can be articulated into a single application.
Related documentation
Loading the sound files
Let's first scaffold and launch a new application:
cd ~/Desktop/webaudio-tutorials
npx @ircam/create@latest 07-step-sequencer --template=nobuild
cd 07-step-sequencer
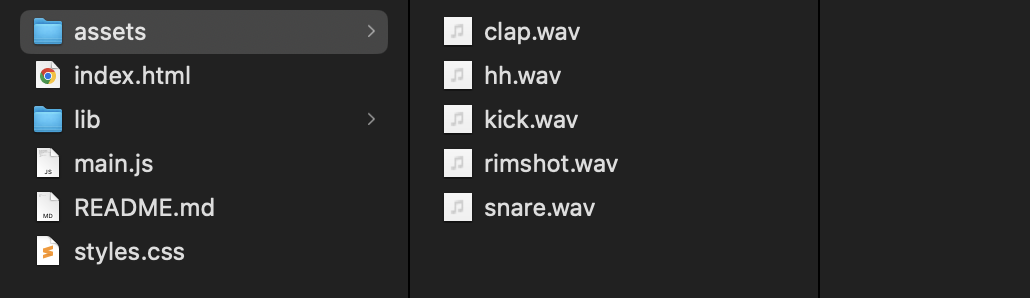
npx serveThen let's put some samples in the ./assets directory.
INFO
The set of samples used in the tutorial can be downloaded here
Then let's load all these files and store them into a list of buffers:
// ./main.js
const audioContext = new AudioContext();
await resumeAudioContext(audioContext);
const buffer = await loadAudioBuffer('./assets/sample.wav', audioContext.sampleRate);
const samples = [
'./assets/hh.wav',
'./assets/clap.wav',
'./assets/rimshot.wav',
'./assets/snare.wav',
'./assets/kick.wav',
];
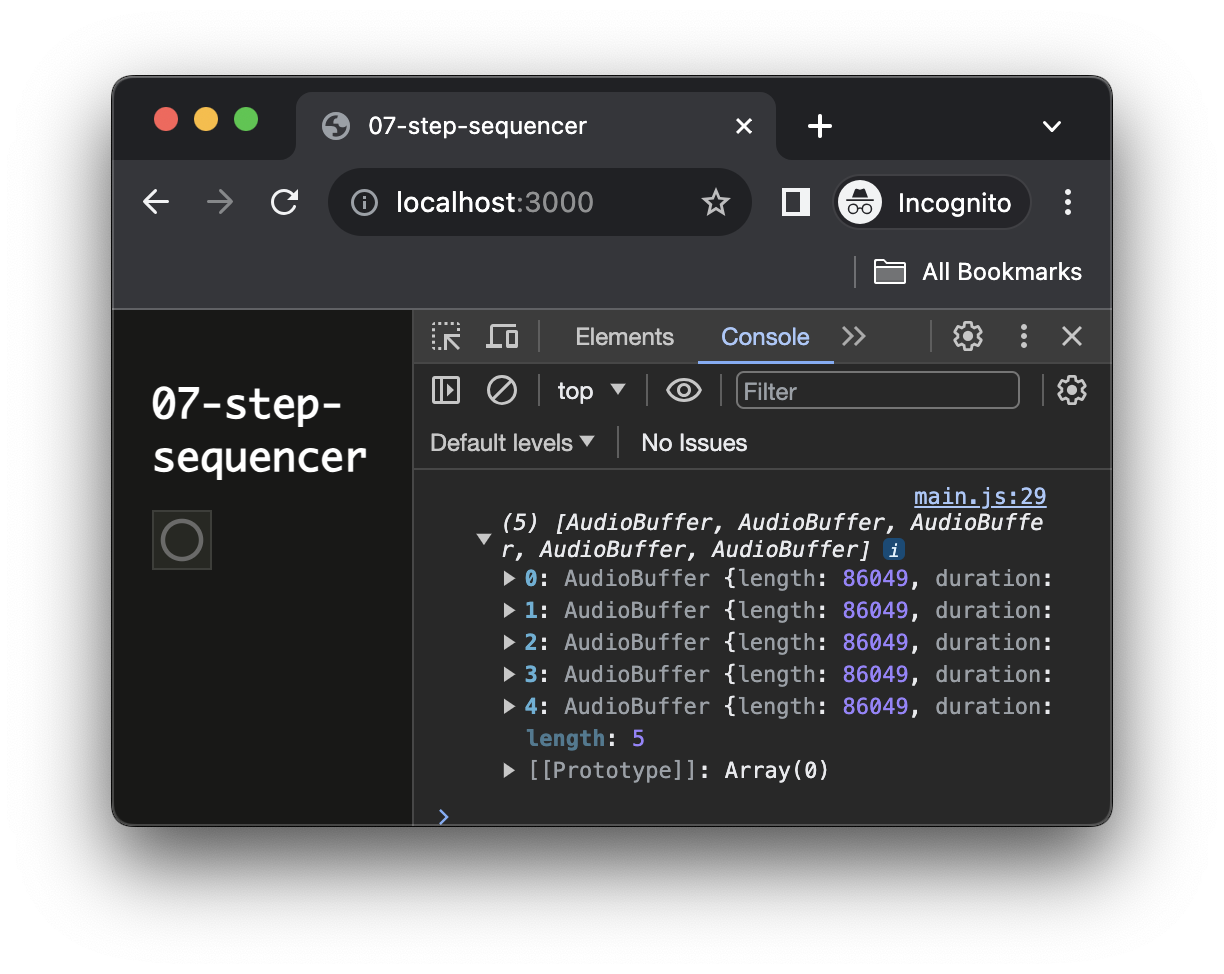
When you reload the page, you should now see the list of the loaded audio buffers logged into the console:
Data structure for the score
Now that our buffers are loaded and ready to use, let's create a data structure that will contain the "score" of our step sequencer.
Our score is defined as follows: for each buffer we define a list (i.e. an Array) of values with length equal to the number of steps (e.g. 16) we want, for a given step if the value is 0 the sound won't be played, and if it is 1 the sound is played. For example, if the score of the kick track is:
[1, 0, 0, 0, 1, 0, 0, 0, 1, 0, 0, 0, 1, 0, 0, 0]The kick sample will be played at step 1, 5, 9 and 13.
Then we can pack the score for each track into a list of tracks, where the index of track score correspond to the index of the buffer in our buffers list:
const score = [
    [0, 1, 0, 1, 0, 1, 0, 1, 0, 1, 0, 1, 0, 1, 0, 1], // "hh" track
    [0, 0, 0, 0, 0, 0, 0, 1, 0, 0, 0, 0, 0, 1, 0, 1], // "clap" track
    [0, 0, 0, 0, 0, 0, 0, 0, 0, 0, 0, 0, 0, 0, 0, 0], // "rimshot" track
    [0, 0, 1, 0, 0, 0, 1, 0, 0, 0, 1, 0, 0, 0, 1, 0], // "snare" track
    [1, 0, 0, 0, 1, 0, 0, 0, 1, 0, 0, 0, 1, 0, 0, 0], // "kick" track
]
Let's then write the code to initialize our score:
// ./main.js
console.log(buffers);
const numTracks = buffers.length; // one track per audio buffer
const numSteps = 16; // the number of steps per track
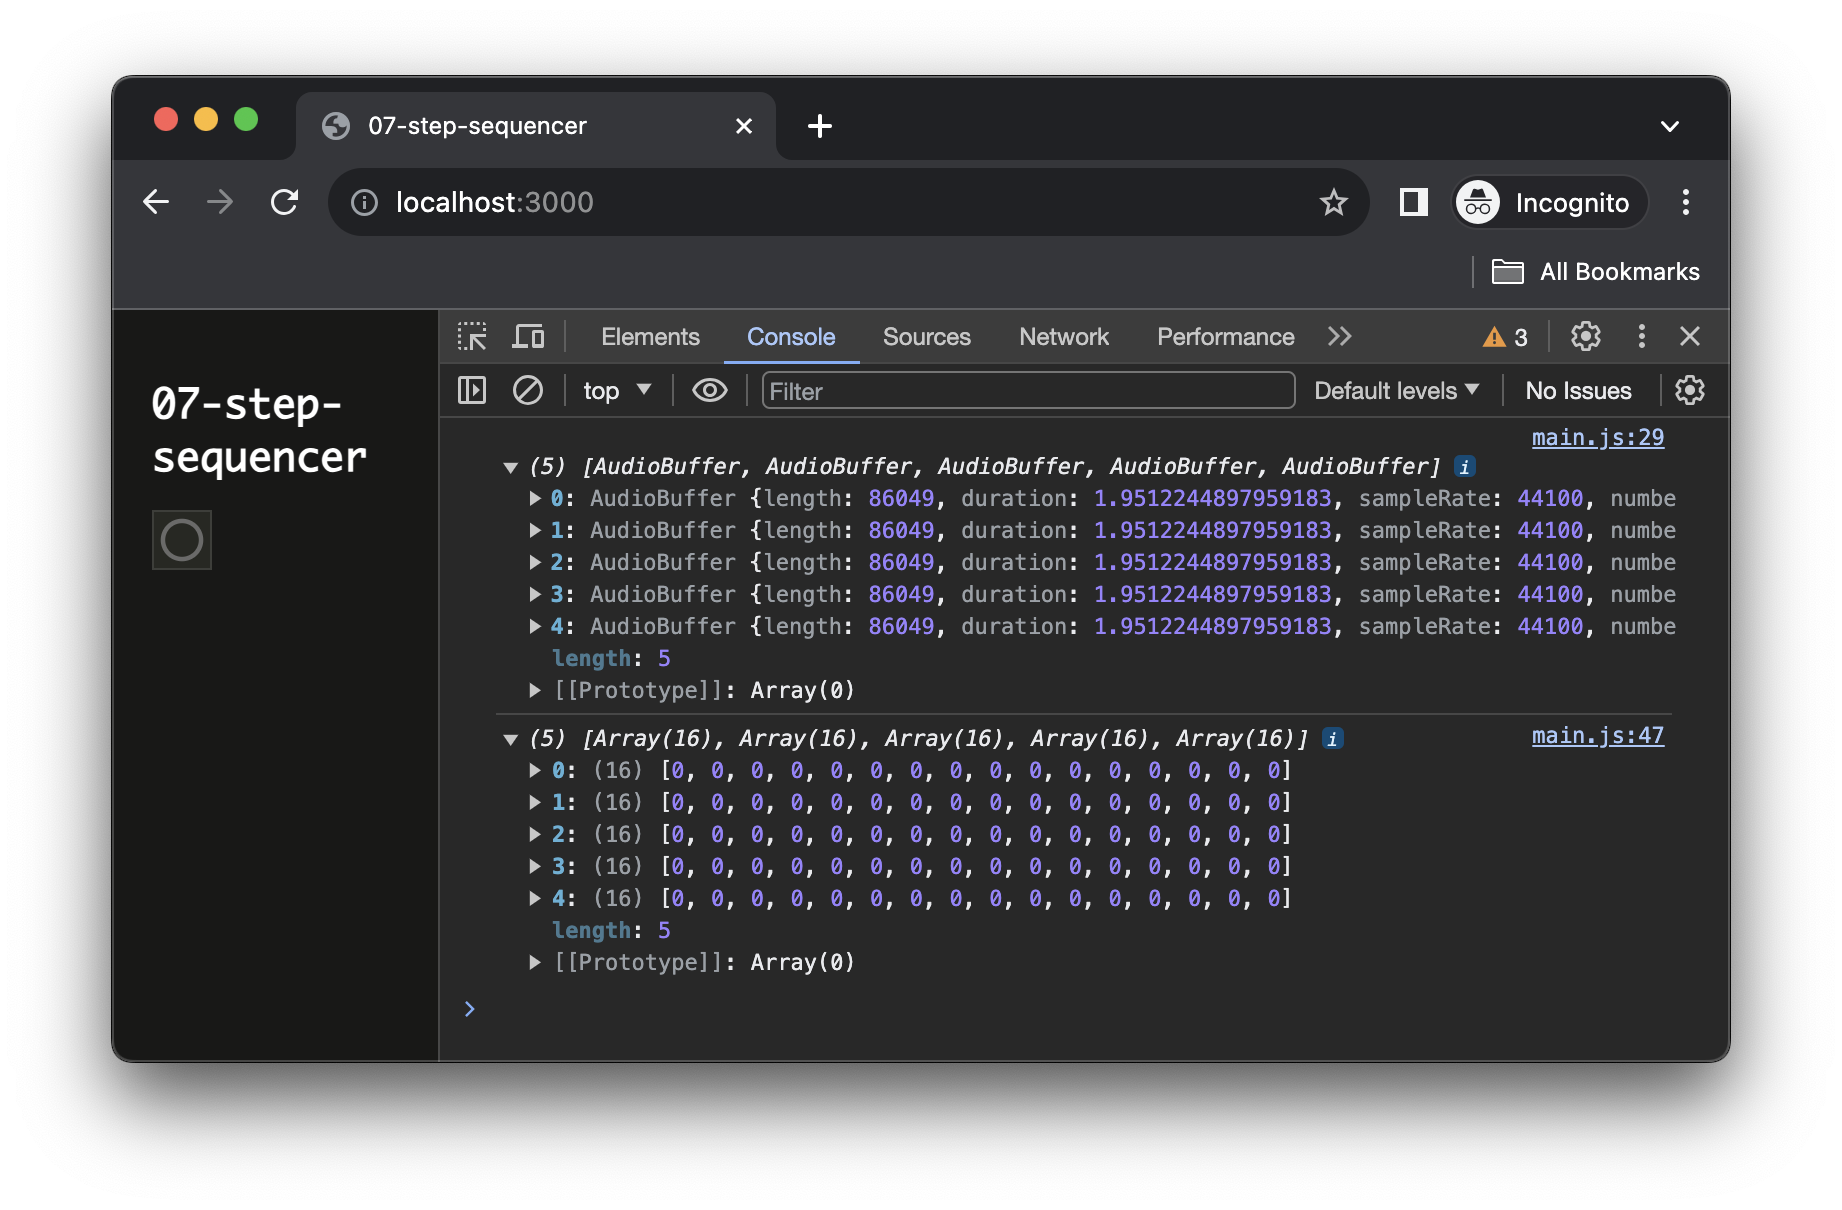
When reloading the page, you should now see the score logged into the console:
Building the track player
To develop our audio player, let's start with importing the scheduler and temporarily replacing our score with a static one. This will allow us to develop our audio engine without having to create a graphical user interface (GUI) to interact with the score.
// ./main.js
import { html, render } from 'https://unpkg.com/lit-html';
import { Scheduler } from 'https://unpkg.com/@ircam/sc-scheduling@0.1.6';
import 'https://unpkg.com/@ircam/sc-components@latest';
// ...
// const score = [];
// // create each track and push it into our score
// for (let i = 0; i < numTracks; i++) {
// const track = [];
// // initialize the track with zeros
// for (let j = 0; j < numSteps; j++) {
// track[j] = 0;
// }
// // track is now: [0, 0, 0, 0, 0, 0, 0, 0, 0, 0, 0, 0, 0, 0, 0, 0]
// // push it into the score
// score[i] = track;
// }
Then let's create our TrackEngine class, this class will be responsible for rendering one single track of our score.
// ./main.js
console.log(score);
class TrackEngine {
constructor(audioContext, buffer, track, BPM) {
this.audioContext = audioContext;
this.buffer = buffer;
this.track = track;
this.BPM = BPM;
// current step in the score
this.step = 0;
// ouput node so that we can connect to the outside world
this.output = this.audioContext.createGain();
// bind the render method so that we don't loose the context
this.render = this.render.bind(this);
}
Finally, let's create our scheduler and instantiate all our tracks:
// ./main.js
const trackEngines = []; // to store our TrackEngine instances
const BPM = 180; // default BPM
// create a scheduler running in audio timeline
const scheduler = new Scheduler(() =>  audioContext.currentTime);
// start all track on the next second
const startTime = Math.ceil(audioContext.currentTime);

// for each track in the score
for (let i = 0; i < numTracks; i++) {
  // pick buffer and track according to current index
  const buffer = buffers[i]
  const track = score[i];
  // create the track engine and connect it to audio destination
  const trackEngine = new TrackEngine(audioContext, buffer, track, BPM);
  trackEngine.output.connect(audioContext.destination);
  // add to scheduler and store into the trackEngines list
  scheduler.add(trackEngine.render, startTime);
  trackEngines.push(trackEngine);
}
If you reload now, you should now hear this rather nice drum:
Creating the user interface
Now that our synthesizer is working let's create a user interface to be able to interact with our score:
// ./main.js
render(html`
  <h1>07-step-sequencer</h1>
  <sc-matrix
    .value=${score}
  ></sc-matrix>
`, document.body);
Done 😃
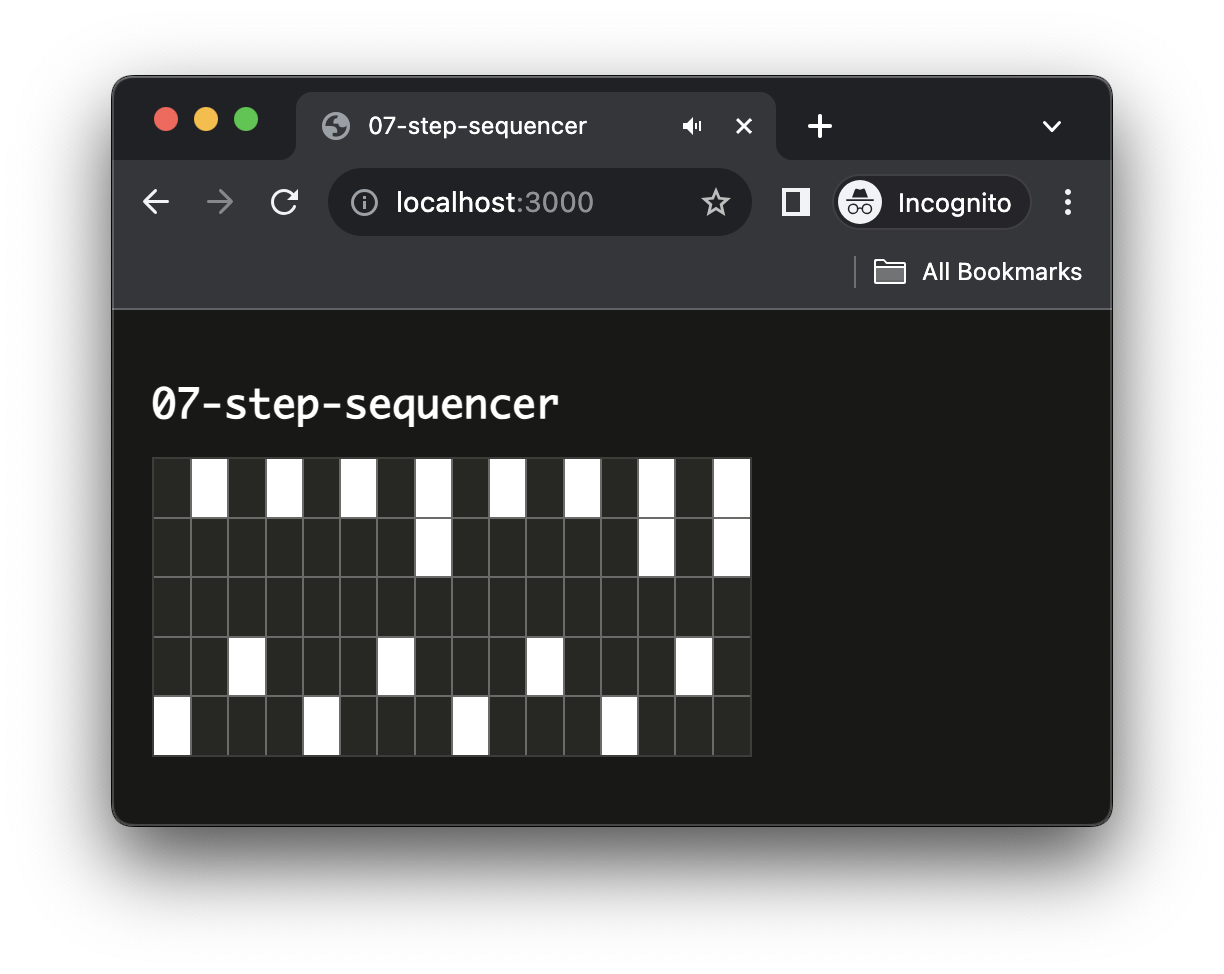
This works that simply because in JavaScript, Arrays are always passed by reference, which means that both the GUI and the TrackEngines share a reference to the same object. Therefore any change made on the score by the <sc-matric> can automatically be seen by the corresponding TrackEngine.
Finally, let's just remove our "fake" score to replace it back with the empty one generated from the code:
const numTracks = buffers.length; // one track per audio buffer
const numSteps = 16; // the number of steps per track

const score = [];
// create each track and push it into our score
for (let i = 0; i < numTracks; i++) {
  const track = [];
  // initialize the track with zeros
  for (let j = 0; j < numSteps; j++) {
    track[j] = 0;
  }
  // track is now: [0, 0, 0, 0, 0, 0, 0, 0, 0, 0, 0, 0, 0, 0, 0, 0]
  // push it into the score
  score[i] = track;
}

// fake score for developing the audio engine
const score = [
    [0, 1, 0, 1, 0, 1, 0, 1, 0, 1, 0, 1, 0, 1, 0, 1], // "hh" track
    [0, 0, 0, 0, 0, 0, 0, 1, 0, 0, 0, 0, 0, 1, 0, 1], // "clap" track
    [0, 0, 0, 0, 0, 0, 0, 0, 0, 0, 0, 0, 0, 0, 0, 0], // "rimshot" track
    [0, 0, 1, 0, 0, 0, 1, 0, 0, 0, 1, 0, 0, 0, 1, 0], // "snare" track
    [1, 0, 0, 0, 1, 0, 0, 0, 1, 0, 0, 0, 1, 0, 0, 0], // "kick" track
]

console.log(score);
Thanks to this dynamic score, if you add a new sample to change the number of steps, all the application will change dynamically without further work (which is quite nice...)
Panning the tracks
In this last step, we will just add a stereo panning effect on our tracks to show you how simple it is regarding the architecture of our code.
for (let i = 0; i < numTracks; i++) {
  // pick buffer and track according to current index
  const buffer = buffers[i]
  const track = score[i];
  // create the track engine and connect it to audio destination
  const trackEngine = new TrackEngine(audioContext, buffer, track, BPM);
  trackEngine.output.connect(audioContext.destination);
  // create a stereo panner node
  const panner = audioContext.createStereoPanner();
  // randomize left (-1) / right (1) for all tracks
  panner.pan.value = Math.random() * 2 - 1;
  // connect panner in between trackEngine and destination
  trackEngine.output.connect(panner);
  panner.connect(audioContext.destination);

  // add to scheduler and store into the trackEngines list
  scheduler.add(trackEngine.render, startTime);
  trackEngines.push(trackEngine);
}
Going further
There are several ways you can improve the application, for example you could:
- Add a control for panning each track independently
- Add other effects
- Add a visual feedback to display the current step
- Add some control over the BPM
- Generate a default score according to the number of tracks and number of steps
Conclusion
In this tutorial, you have learned how to build a simple step sequencer, using some pattern that will allow you to simply make you application evolve.
This is all for this series on timing and scheduling.