Implementing a Reusable Feedback Delay
In this tutorial, we will build on top of the patterns we just reviewed to build a reusable feedback delay effect.
Related Documentation
Scaffolding project
First things first, let's create a new project using the @ircam/create command. Open a Terminal and write the following commands:
cd ~/Desktop/webaudio-tutorials
npx @ircam/create@latest 04-feedback-delay  --template=nobuild
cd 04-feedback-delay
npx serve
Then open the 04-feedback-delay directory in your text editor
INFO
If you are wondering what's going on here, please check the more detailed step by step guide here
Trigger source at regular interval
To test our feedback delay, let's create some source triggered at regular interval. Fortunately, the default project we just created already provides us an AudioBuffer which will be perfect to that end.
Then, let's just modify the code so that instead of having to manually trigger the source, it is triggered automatically at a regular interval, for example every second.
import { html, render } from 'https://unpkg.com/lit-html';
import 'https://unpkg.com/@ircam/sc-components@latest';

import resumeAudioContext from './lib/resume-audio-context.js';
import loadAudioBuffer from './lib/load-audio-buffer.js';

const audioContext = new AudioContext();
await resumeAudioContext(audioContext);

const buffer = await loadAudioBuffer('./assets/sample.wav', audioContext.sampleRate);

setInterval(() => {
    const src = audioContext.createBufferSource();
    src.connect(audioContext.destination);
    src.buffer = buffer;
    src.start();
}, 1000);

render(html`
  <h1>04-feedback-delay</h1>
  <sc-bang
    @input=${e => {
      const src = audioContext.createBufferSource();
      src.connect(audioContext.destination);
      src.buffer = buffer;
      src.start();
    }}
  ></sc-bang>
`, document.body);
If you reload the page you should now ear the following:
Create a module for the FeedbackDelay class
To implement our FeedbackDelay, we will create a new module that we will import into our main.js file. Create a new file called FeedbackDelay.js inside the lib directory:
04-feedback-delay
├── assets
├── lib
│   ├── FeedbackDelay.js
│   ├── load-audio-buffer.js
│   └── resume-audio-context.js
├── index.html
├── main.js
├── README.md
└── styles.css
And write the basic structure of the class and export it as default export:
// ./lib/FeedbackDelay.js
class FeedbackDelay {
  constructor() {
    console.log('FeedbackDelay created!');
  }
}

export default FeedbackDelay;
Then, let's import our newly created FeedbackDelay class into the main.js file and create a new instance to check that everything works as expected:
// main.js
import resumeAudioContext from './lib/resume-audio-context.js';
import loadAudioBuffer from './lib/load-audio-buffer.js';
import FeedbackDelay from './lib/FeedbackDelay.js';
const audioContext = new AudioContext();
await resumeAudioContext(audioContext);
const buffer = await loadAudioBuffer('./assets/sample.wav', audioContext.sampleRate);
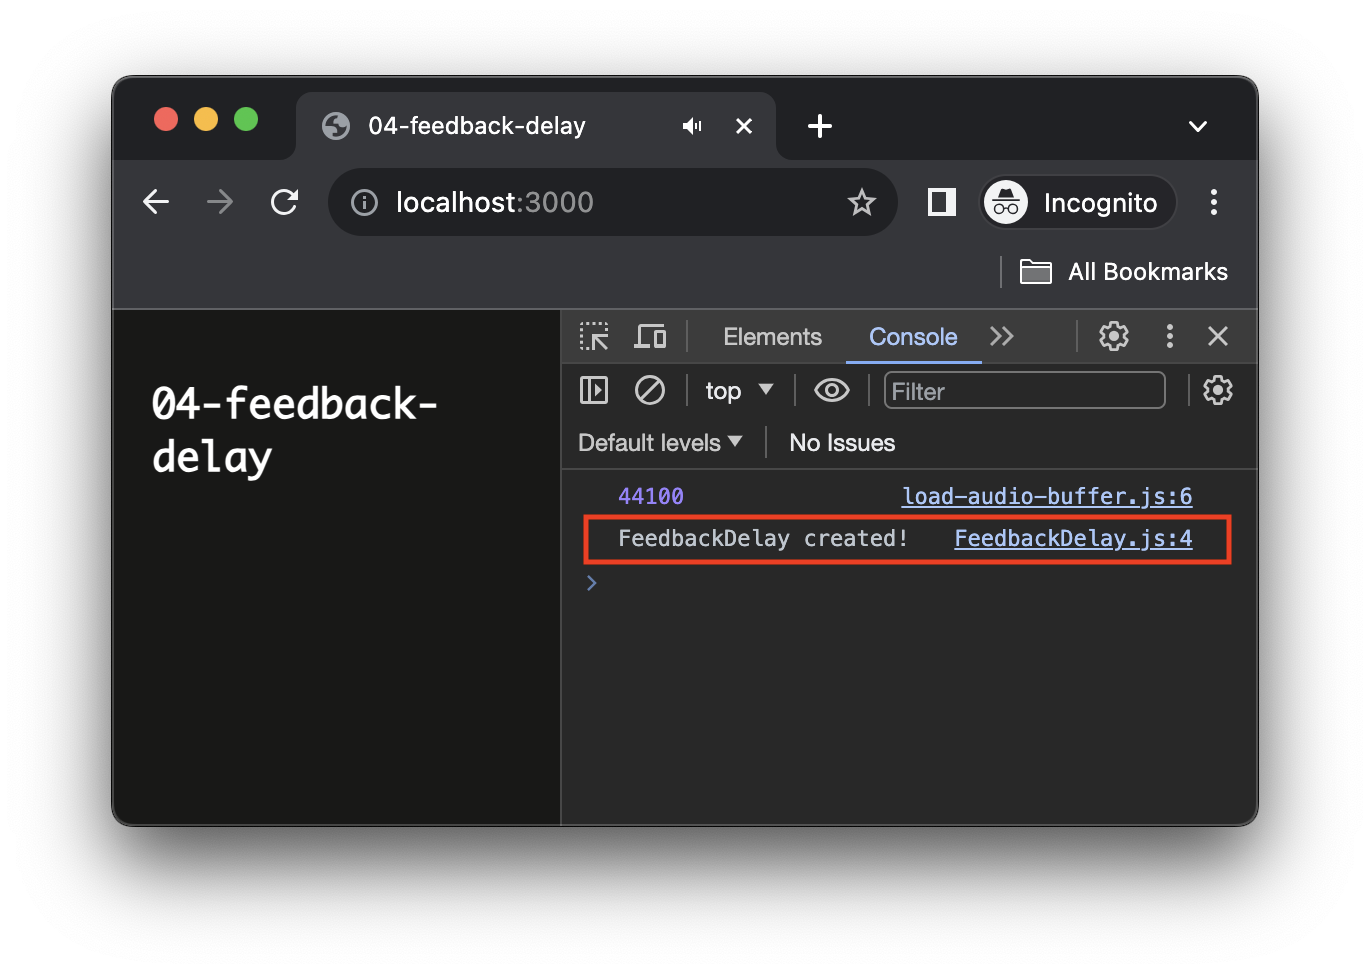
const delay = new FeedbackDelay();If you reload the page, you should see the log appear from the FeedbackDelay constructor in the console:
Before going into the implementation of the actual audio graph of the delay, we can already see an issue with our code. Our feedback delay will very probably have to create some nodes to process the audio stream, but our AudioContext only lives in the main.js "context".
To fix this, let's modify our FeedbackDelay constructor so that we can pass a resumed AudioContext when we instantiate it. While we are here, let's also pass it an object as second argument that will allow us to configure it later:
// ./lib/FeedbackDelay.js
class FeedbackDelay {
  constructor()
  constructor(audioContext, options = {})
  {
    console.log('FeedbackDelay created!');
    // store the audioContext instance inside the FeedbackDelay instance
    this.audioContext = audioContext;
    // prepare logic for handling configuration options
    this.options = Object.assign({}, options);
  }
}// main.js
const delay = new FeedbackDelay();
const delay = new FeedbackDelay(audioContext, {}); Connecting to the audio graph
So far so good, we have our FeedbackDelay instance created, but it is not yet inserted into our audio graph. Indeed, for now our AudioBufferSourceNode is directly connected to the destination, while we would like to connect it to our delay, which itself should be connected to the destination, such as:
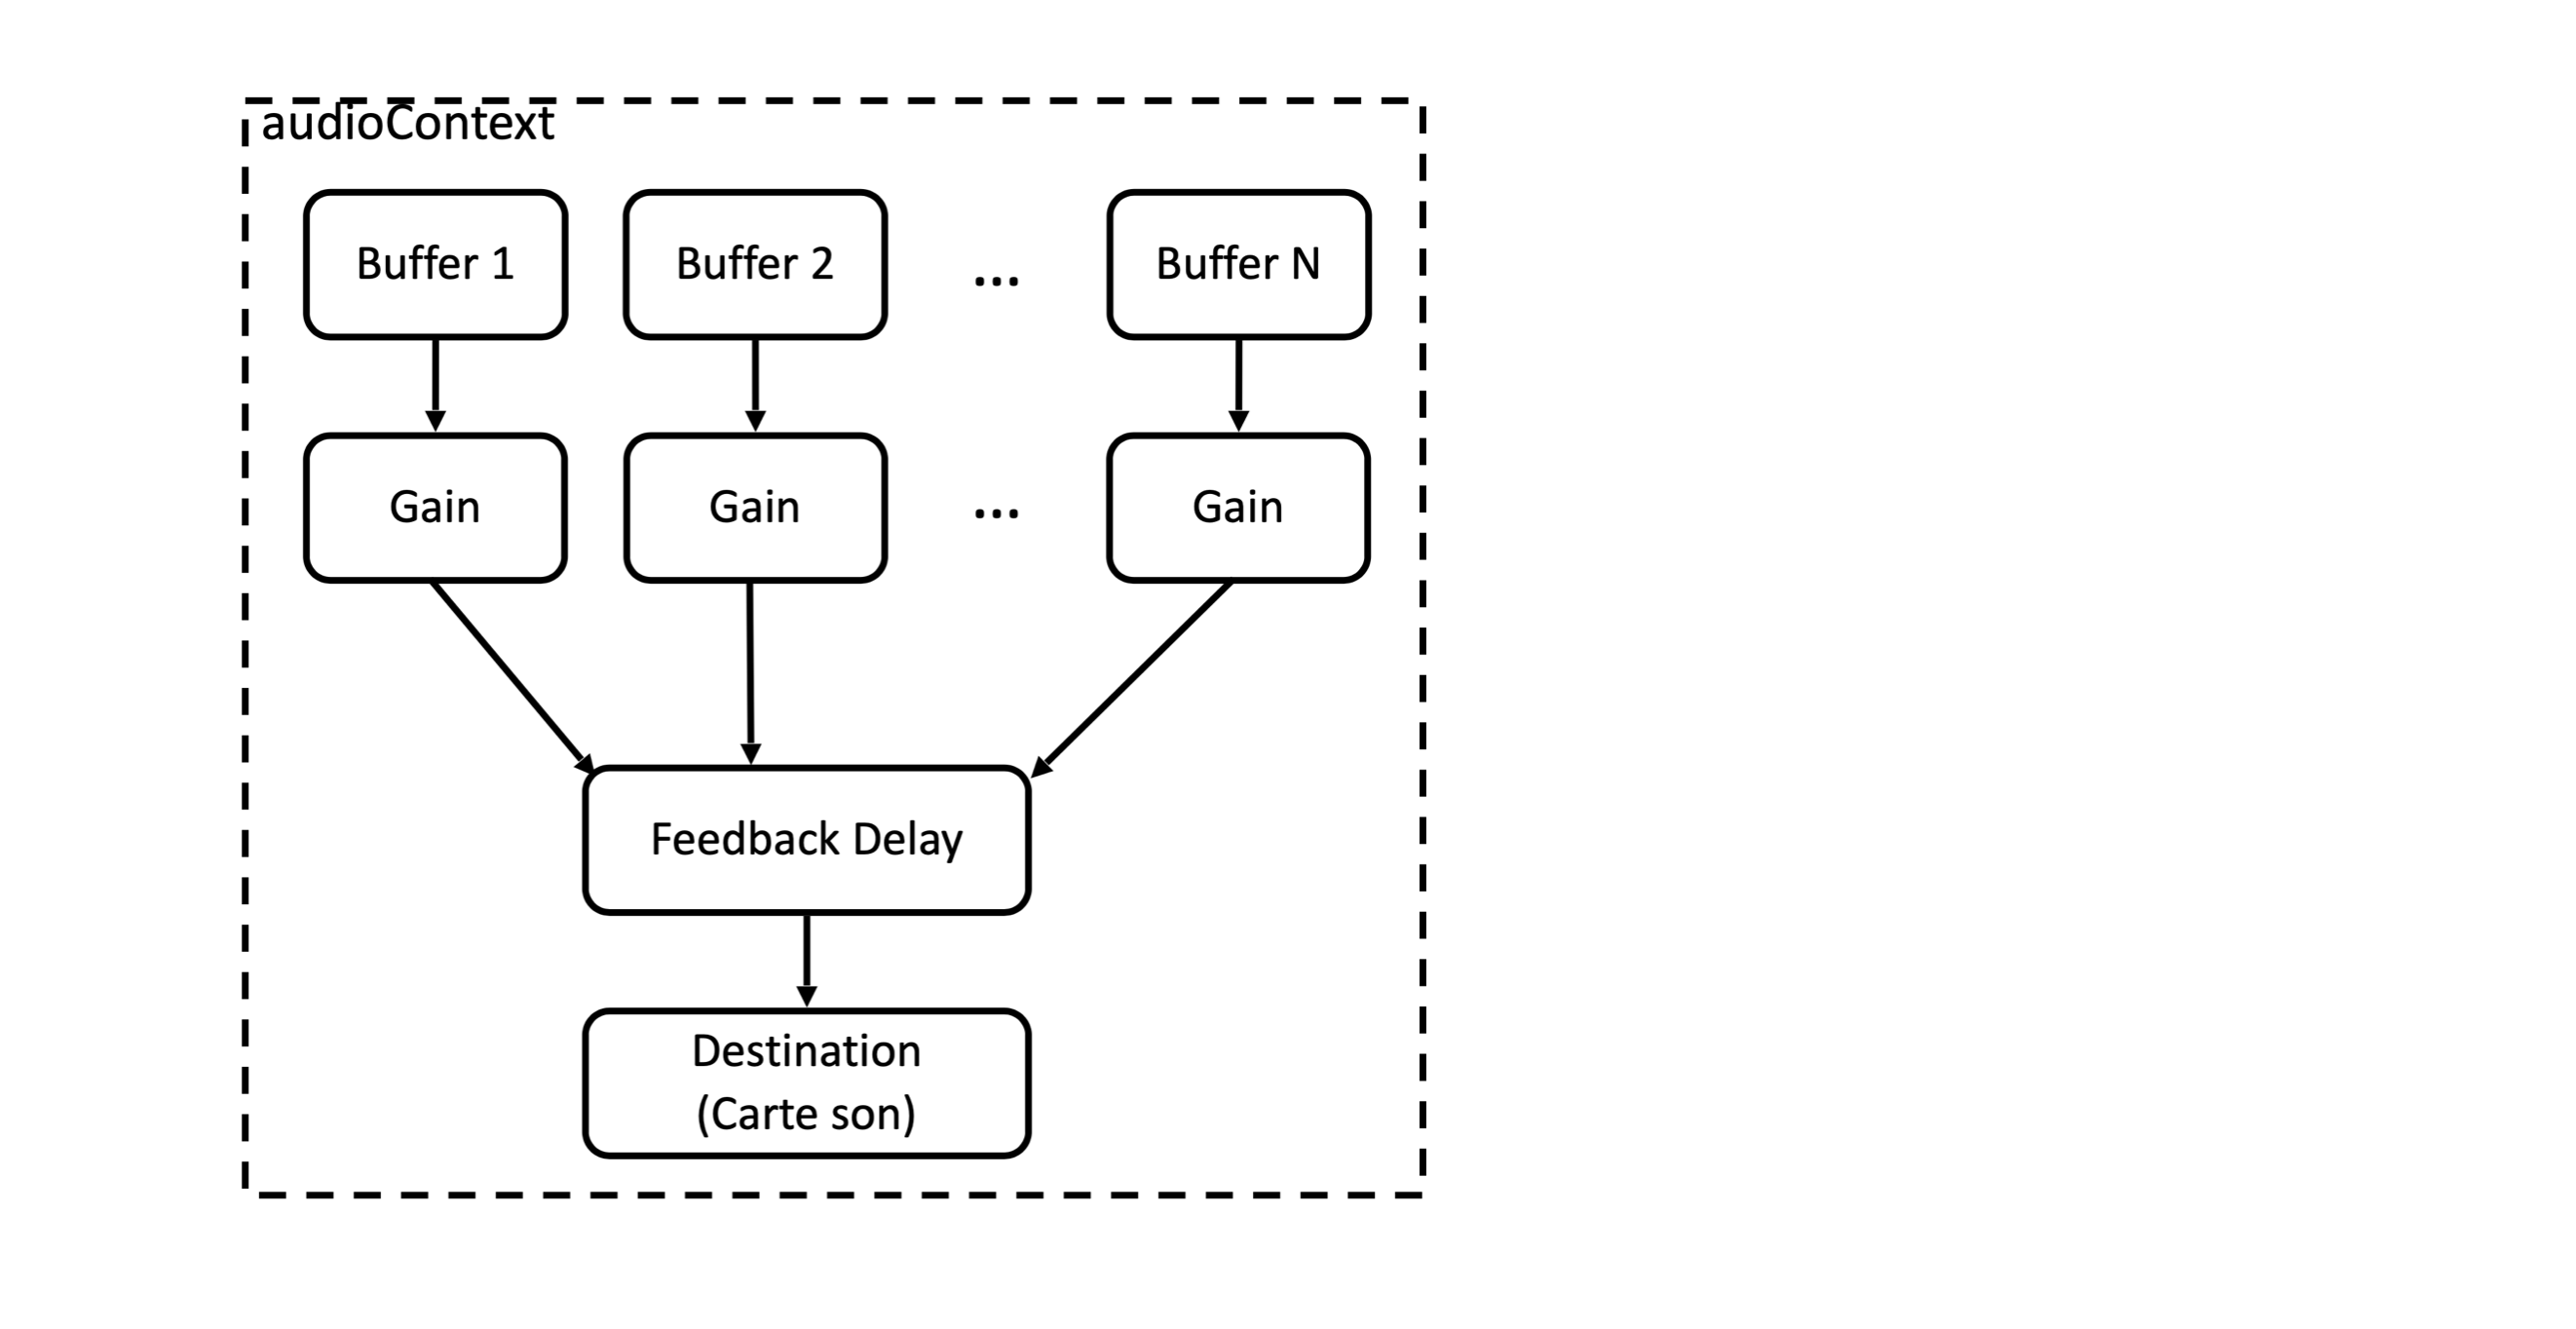
As our FeedbackDelay is not a full featured native AudioNode, let's consider it will expose two AudioNode attributes, which we will be called input and output, to which native AudioNode can connect, or on which they can be connected.
So, let's start by modifying our main.js file to insert our feedback delay between the source and the destination:
const buffer = await loadAudioBuffer('./assets/sample.wav', audioContext.sampleRate);
const delay = new FeedbackDelay(audioContext, {});
delay.output.connect(audioContext.destination);

setInterval(() => {
    const src = audioContext.createBufferSource();
    src.connect(audioContext.destination);
    src.connect(delay.input);
    src.buffer = buffer;
    src.start();
}, 1000);
Of course if you try to reload now, you will run into the following error
Uncaught TypeError: Cannot read properties of undefined (reading 'connect')Indeed, the line:
// main.js
delay.output.connect(audioContext.destination);
tries to call some connect method on something that is not defined into our FeedbackDelay class. So let's fix this issue, by creating the input and output nodes of our FeedbackDelay:
// ./lib/FeedbackDelay.js
class FeedbackDelay {
  constructor(audioContext, options = {}) {
    // store the audioContext instance inside the FeedbackDelay instance
    this.audioContext = audioContext;
    // prepare logic for handling configuration options
    this.options = Object.assign({}, options);

    this.input = this.audioContext.createGain();
    this.output = this.audioContext.createGain();
  }
}
OK, now that our FeedbackDelay expose an input and an output attribute, which are both AudioNode, the code should not complain anymore. Then, if you reload your page, you should see that all errors disappeared.
But all sound as well... This is because inside our FeedbackDelay class the input and output are not connected together. Let's fix that with implementing our feedback delay for good.
Implement the internal audio graph
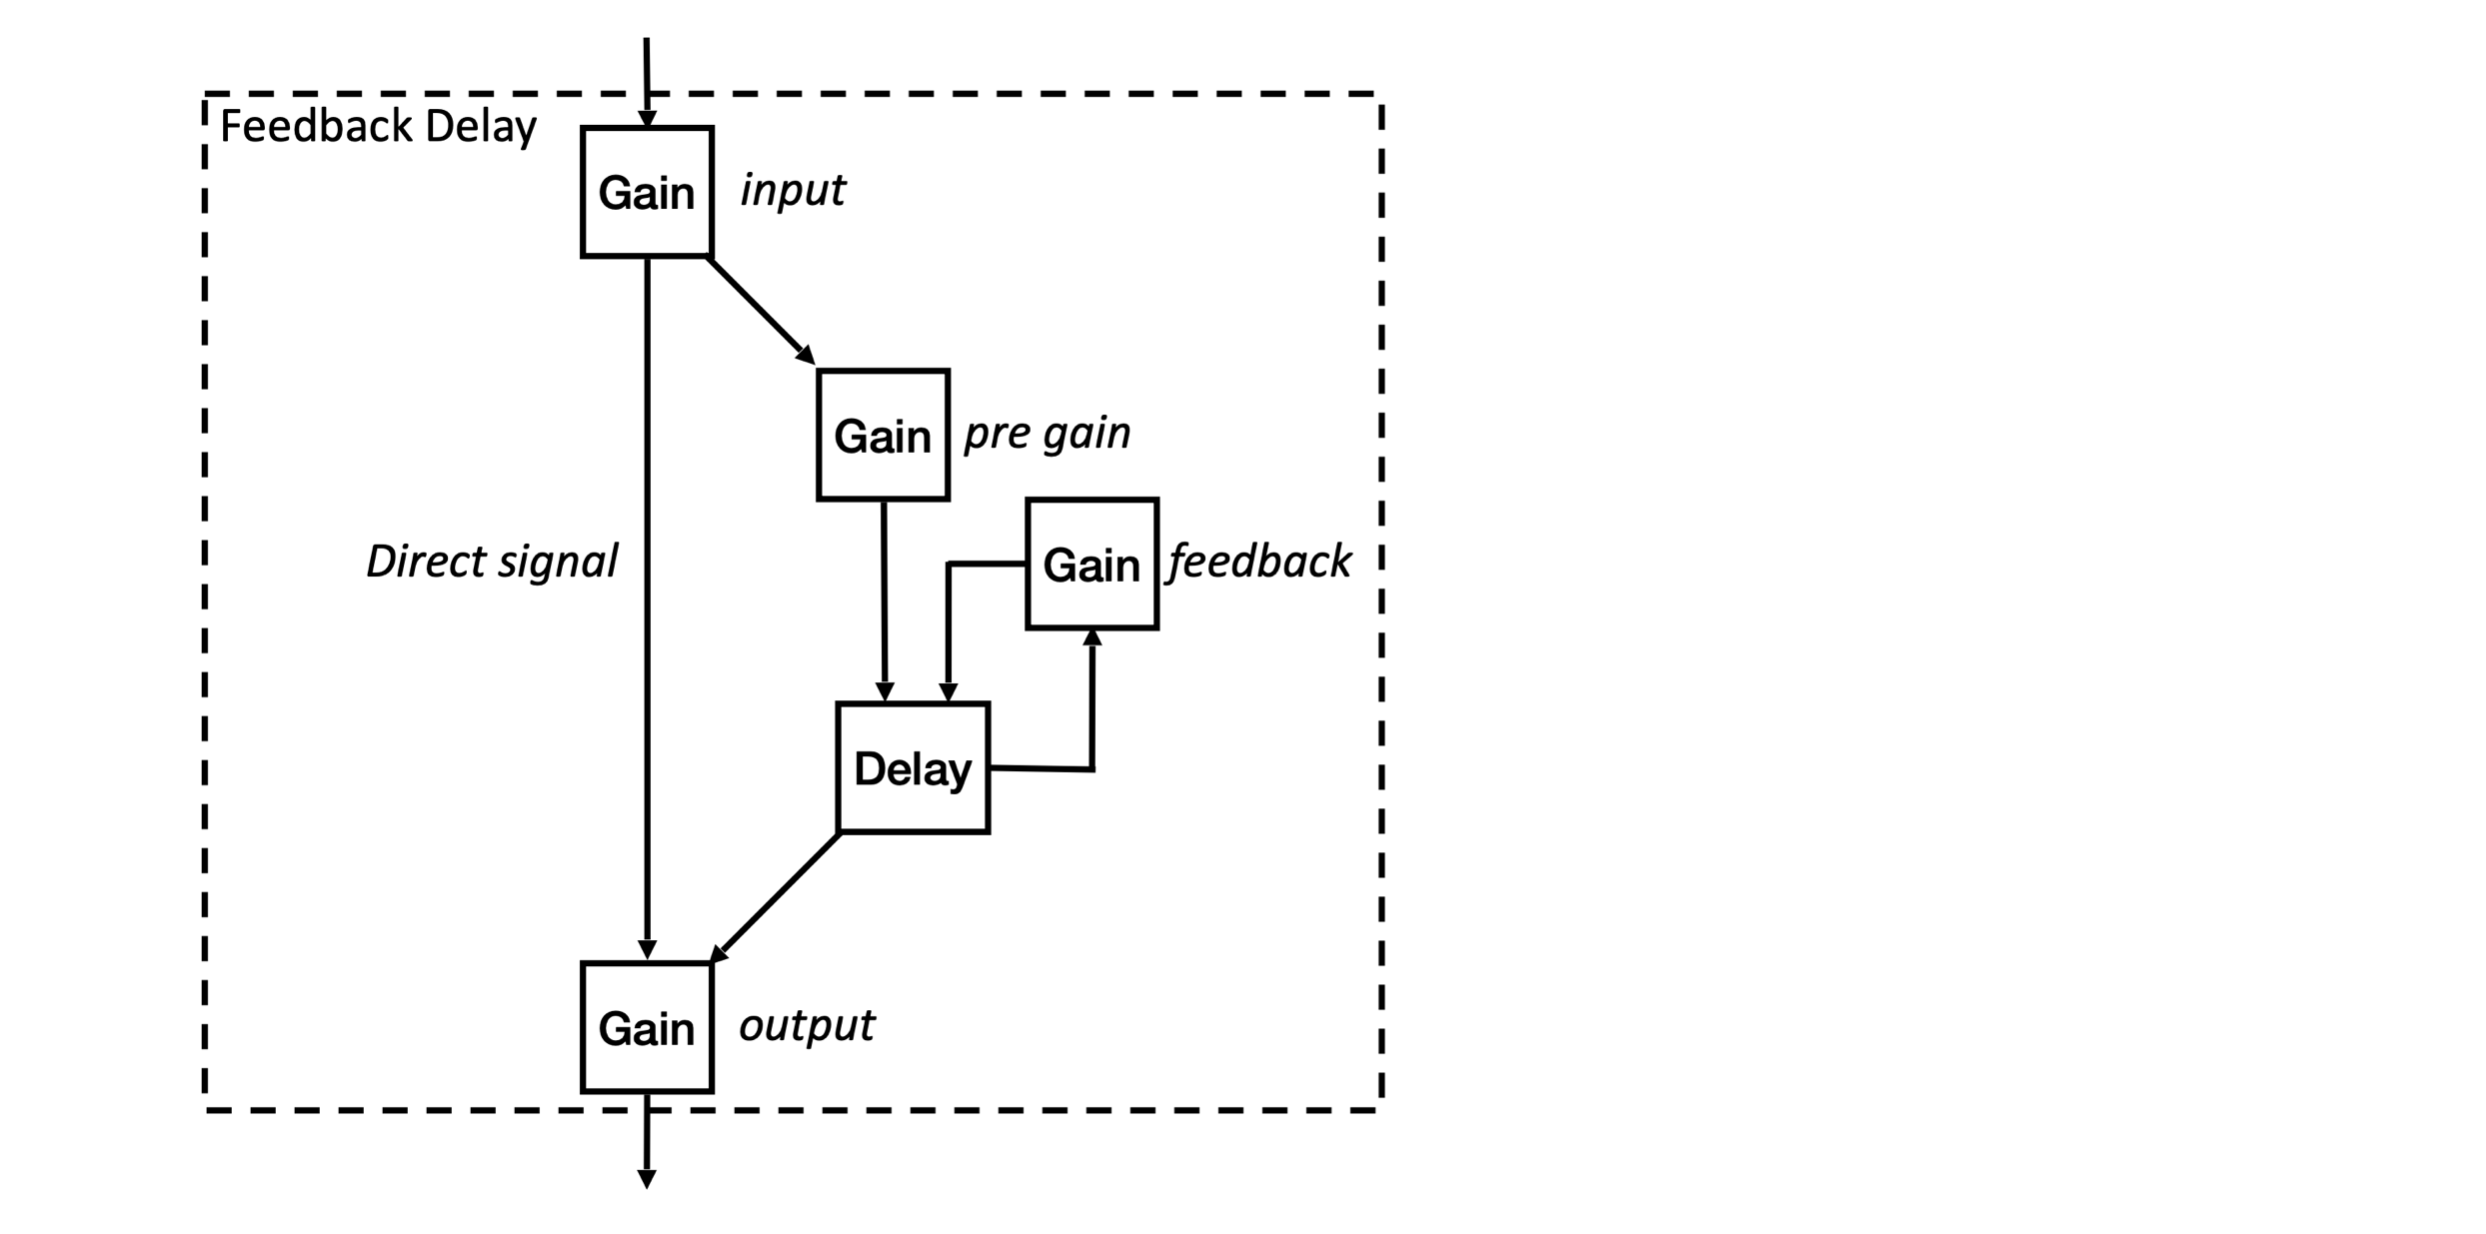
The internal graph of our FeedbackDelay will look like the following, with direct connection between the input and output to propagate the direct signal, and branch containing the delay itself with its feedback loop.
Let's thus implement this graph into our FeedbackDelay class:
// ./lib/FeedbackDelay.js
class FeedbackDelay {
constructor(audioContext, options = {}) {
// store the audioContext instance inside the FeedbackDelay instance
this.audioContext = audioContext;
// define default parameter values that can be overriden with options
this.options = Object.assign({
preGain: 0.7,
delayTime: 0.2,
feedback: 0.8,
}, options);
/* Setup audio nodes */
// input / ouput node
this.input = this.audioContext.createGain();
this.output = this.audioContext.createGain();
// feedback loop nodes
this.preGain = this.audioContext.createGain();
this.preGain.gain.value = this.options.preGain;
this.delay = this.audioContext.createDelay(1); // "1" is the maximum delay time
this.delay.delayTime.value = this.options.delayTime;
Tada! I you reload now, you will be able to ear the feedback delay line in action:
INFO
You can hear that the overlap between the delay line and a new triggering of a source is not very clean, while it should be as we trigger a new sound every 1 sec and our delayTime is 0.2 sec. This is due to how we trigger our source. Indeed using setInterval as we did in first step is generally not a good idea in audio applications as this timer is not precise enough. In the next tutorials we will learn how to overcome such timing issues.
User interface
Before concluding this tutorial, let's add some graphical user interface (GUI) to control our feedback delay parameters.
First, let's add new methods to our FeedbackDelay class, which will allow us to simply update some of its parameters from the main.js code:
// ./lib/FeedbackDelay.js
class FeedbackDelay {
constructor(audioContext, options = {}) {
// ...
}
setPreGain(value) {
const timeConstant = 0.01;
const currentTime = this.audioContext.currentTime;
this.preGain.gain.setTargetAtTime(value, currentTime, timeConstant);
}
TIP
As you can see, this time we used the setTargetAtTime automation method of the AudioParam we want to update. Indeed, using this automation method, instead of param.value = newValue as we did until now, will protect us from discontinuities in the computation of the audio signal, preventing all sorts of click and pops.
Now that everything is ready in our FeedbackDelay class, let's just create our user interface:
// main.js
render(html`
<h1>04-feedback-delay</h1>
<div>
<sc-text>preGain</sc-text>
<sc-slider
value=${delay.options.preGain}
@input=${e => delay.setPreGain(e.detail.value)}
></sc-slider>
</div>
<div>
<sc-text>feedback</sc-text>
<sc-slider
value=${delay.options.feedback}
@input=${e => delay.setFeedback(e.detail.value)}
></sc-slider>
</div>
<div>
<sc-text>delayTime</sc-text>
<sc-slider
value=${delay.options.delayTime}
@input=${e => delay.setDelayTime(e.detail.value)}
></sc-slider>
</div>
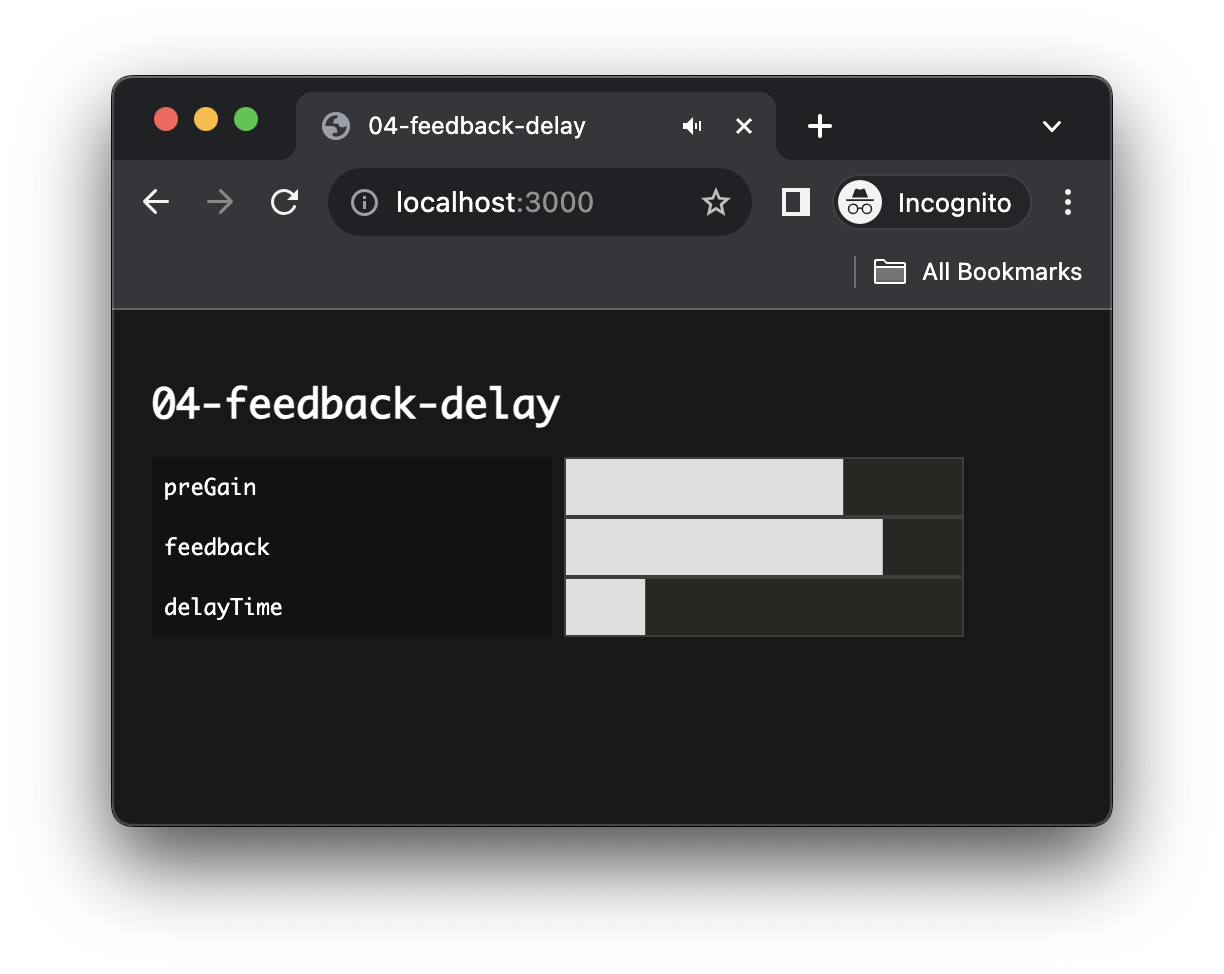
`, document.body);And done! If you reload your page, you should now see the interface and should be able to play with the parameters of your feedback delay:
Conclusion
In this tutorial, you have created an abstract and reusable audio effect using JavaScript classes and modules. With such pattern, you can envision reusing this effect in another project very easily by just copy / paste the file and importing it, or even start creating your own library of audio effects!
In the next tutorials, we will focus on how to fix the issue we have seen with inaccuracy of the setInterval during this tutorial. Properly understand this timing issue and how to fix them is a key element to build more advanced synthesis methods and audio applications.