Setting Up an Environment
In this tutorial, we will install and configure a few things to have all the necessary tools to develop simple Web pages in good conditions.
The set of tools we propose here are not mandatory and many alternatives exists for each of them. If you already have a setup you like and are comfortable with, just skip this page and proceed with your existing setup.
Text Editor
A very important tool to write code is a proper text editor. There are numerous free text editors, each of them with their specific qualities and drawbacks (just keep in mind that the best tool is very often the one you know well...).
Here are two text editors that are quite popular nowadays:
Node.js
Once done, let's continue with installing the Node.js environment. Node.js is a cross-platform JavaScript runtime environment that is often used to develop servers or command-line tools. We won't make an extensive use of Node.js in these series, but only use it to install and run the simple Web server we will need for developing our Web pages.
- Open https://nodejs.org in your favorite browser (which shall not be Safari).
- Download the Long Term Support (LTS) version (at time of writing, the version 20.9.0).
- Open the archive and follow the instructions, choosing all default options...
To make sure everything is installed, open a Terminal prompt, i.e. Applications/Utilities/Terminal.app on Mac.
Type the following command to see the version of the installed Node.js:
node -vPress "Enter" to execute the command and you should see:
v12.16.1Then, type the following command to see the version of the installed Node Package Manager (aka npm, which is automatically installed with Node.js):
npm -vPress "Enter" to execute the command and you should see:
10.1.0
INFO
Note that, depending on when you follow this tutorial, the actual versions you see in the terminal might change. This should not cause any issue with the rest of these tutorials.
Web Server
An important tool to have when developing Web pages, is a Web server that you can launch locally on your computer. In these tutorials, we will only need the most simple Web server: a server able to serve a file from the hard drive when the Web browser requests it.
A large number of options written in different programming languages are available to have such server. In this tutorials we will use serve, a web server developed in the Node.js environment.
To test it, let's open a new Terminal prompt and type:
npx serveThen, press Enter to execute the command. Then the npx tool will propose you to install the package, press y then Enter, the tools will download the package and run the server in your current directory:
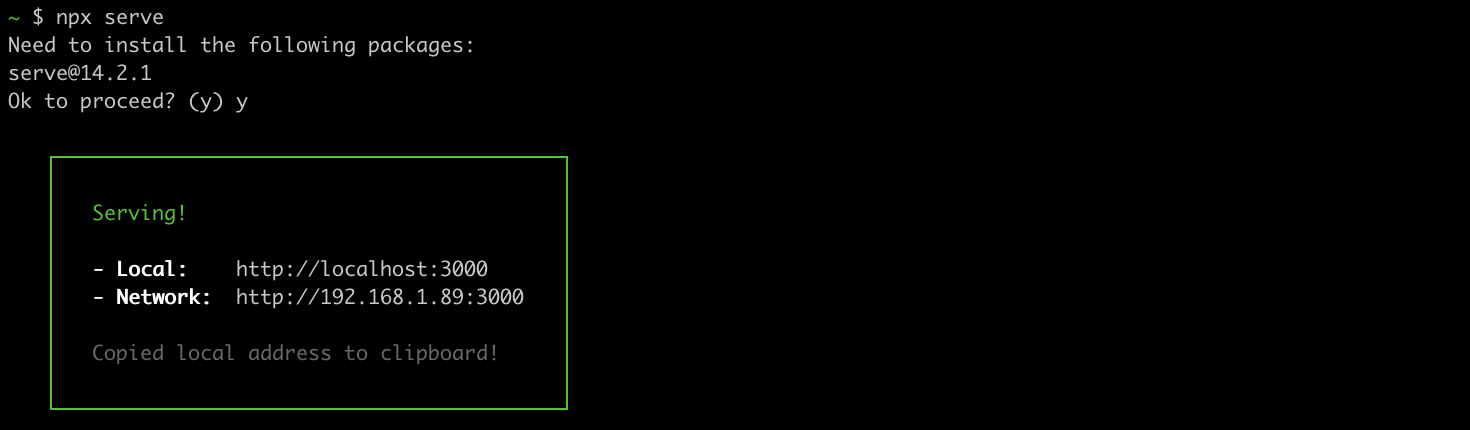
To close the server, press Ctrl + C
WARNING
During this test we just created the server into your desktop which is OK for a simple test but is really not a good idea in general.
Indeed, it is very important to understand and to keep in mind that exposing a directory to the network means that all the files located in this directory will be accessible by any computer connected to the same network as your machine.
So, BE CAREFULL TO NOT EXPOSE any sensitive or private information in this directory.
Configure your Web browser
Lastly, we will configure your browser of choice to suspend its caching mechanisms when running in development.
Google Chrome
Open the "Development tools" panel:
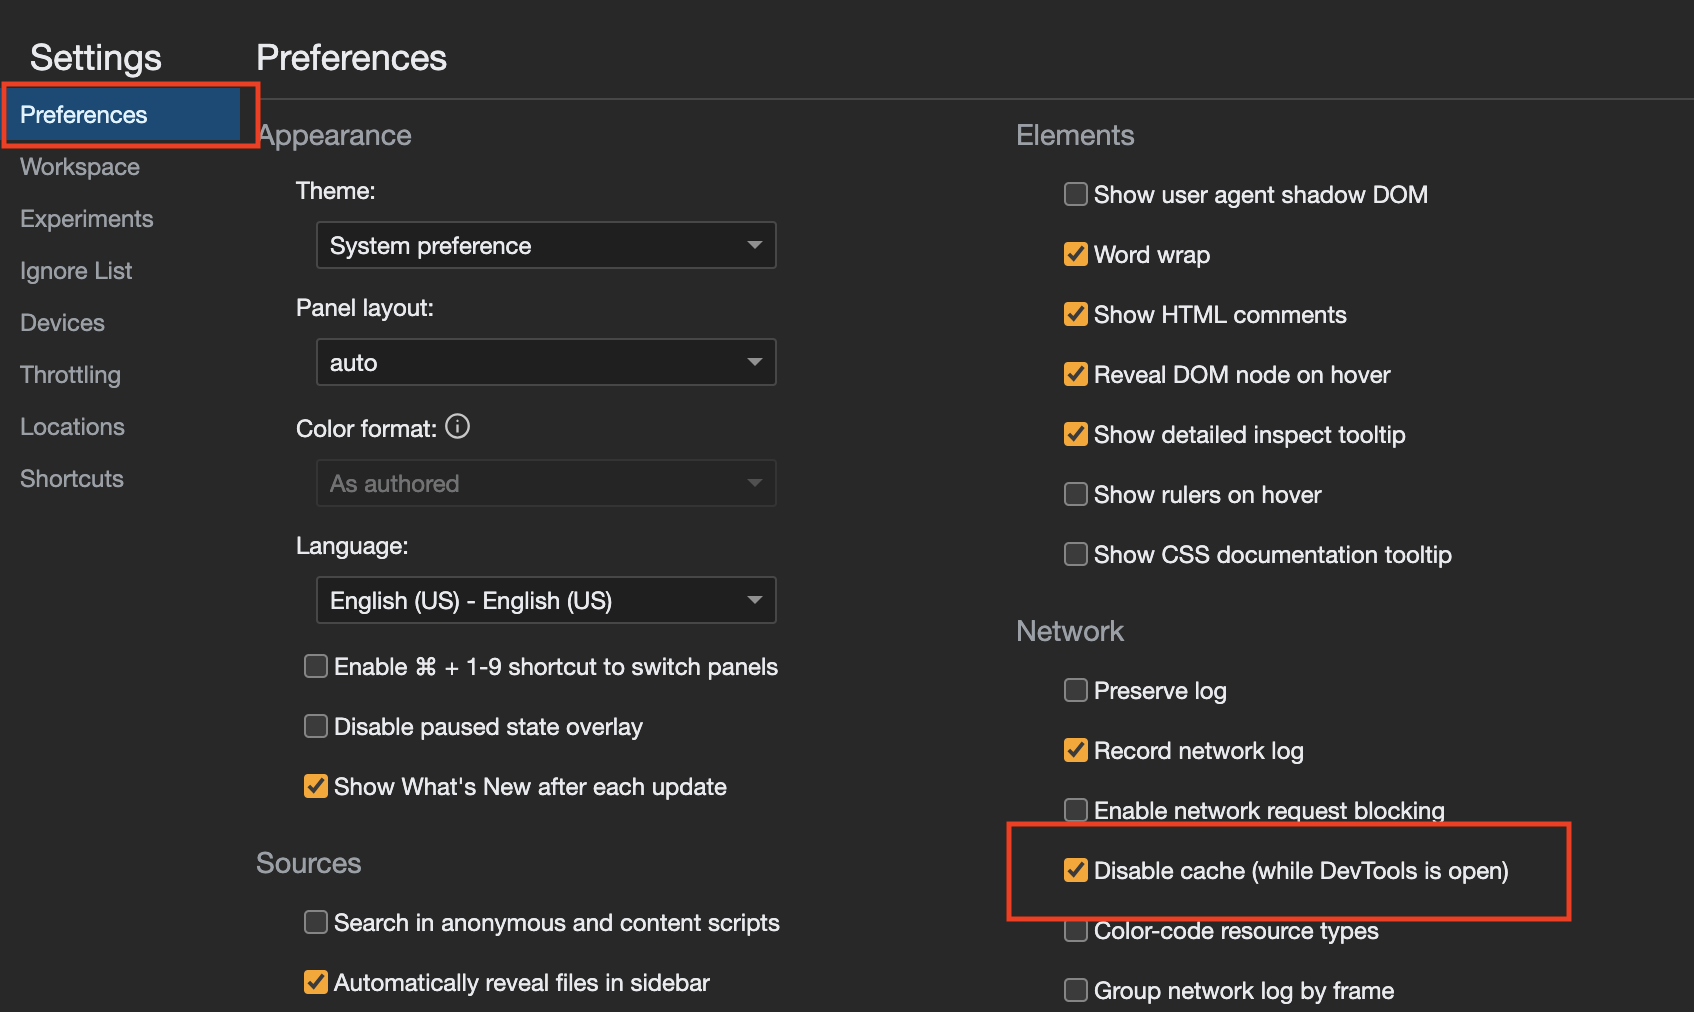
"View > Developer > Developer Tools" orCmd + Shift + JOpen the "Settings" panel by clicking on the wheel on the top right of the development panel:

- In the "Preference" menu, check the "Disable cache (while DevTools is open)" option:
Firefox
Open the "Development tools" panel:
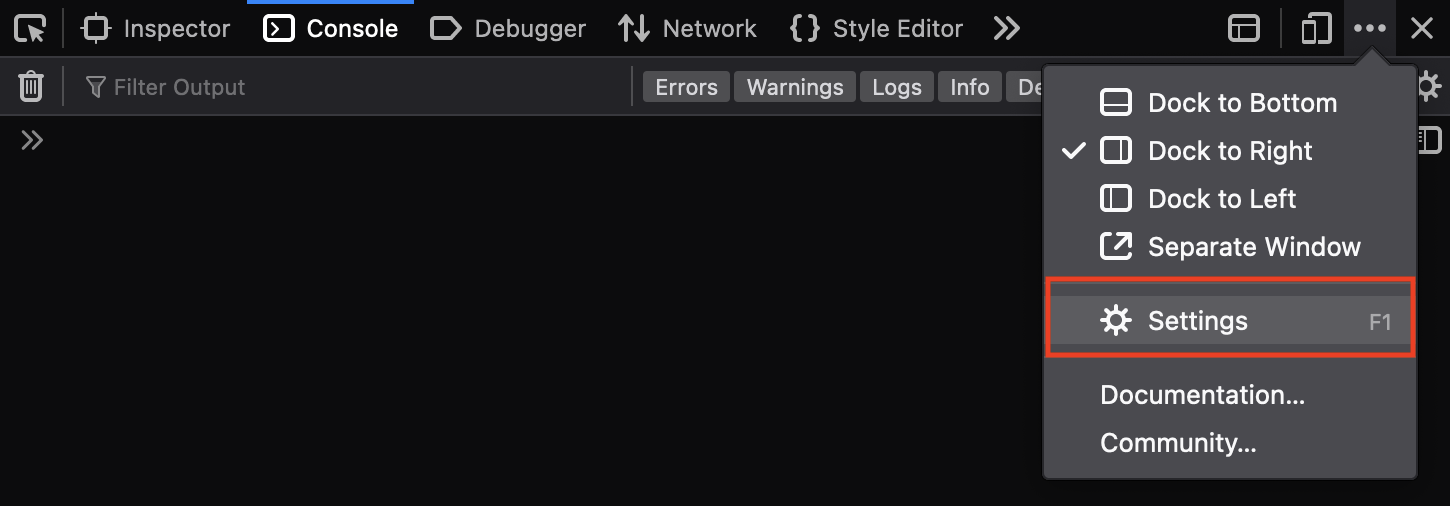
"Tools > Browser Tools > Web Developer Tools" orCmd + Option + IOpen the "Settings" panel by clicking on the wheel on the top right of the development panel:
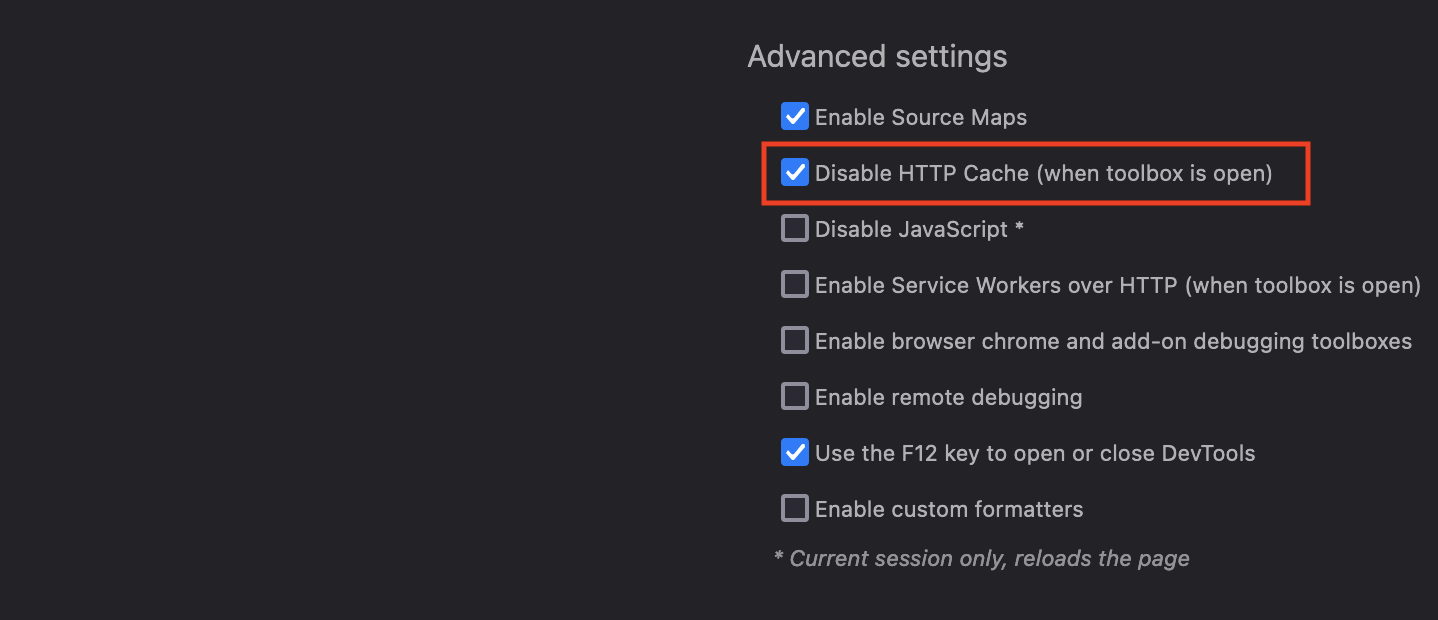
- In the "Advanced Settings" section, check the "Disable HTTP cache (when toolbox is open)" option:
Conclusion
Your system is now ready to use for development! In the next tutorial, we will develop a simple Web page, which will allow us to have a first hands-on with HTML, CSS and JavaScript.