Manufacturing pieces
In this chapter, we will describe how to prepare and manufacture all the pieces you need to build the speaker!
Feel free to run through the entire page before starting to make sure you have everything you need and to adapt the project depending on your specific constraints.
If you haven't done it before, download the necessary files here.
3D printing pieces
If you unzip the file, you will have access to two .stl files :
- separation_V1.stl : which is the separation plate that has to be printed using a regular PLA

- front-face_V1.stl : which is the front face (face 1), that has to be printed using PAHT-CF

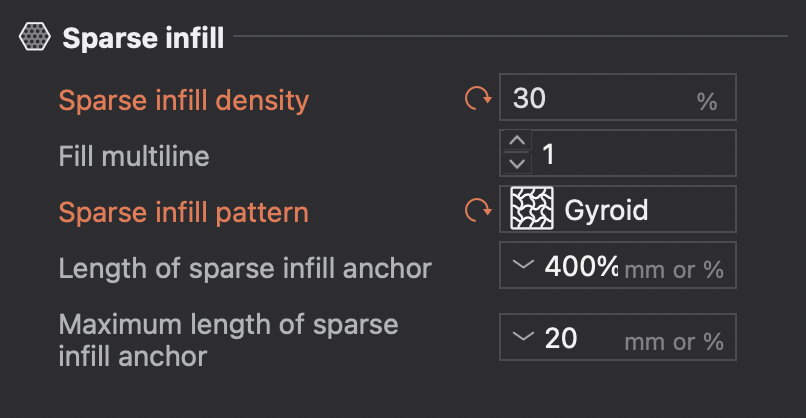
Both pieces are printed with a 30% sparse infill density using a gyroid sparse infill pattern (not using these parameters should not be critical but will affect the general strength and resonances of the structure).
WARNING
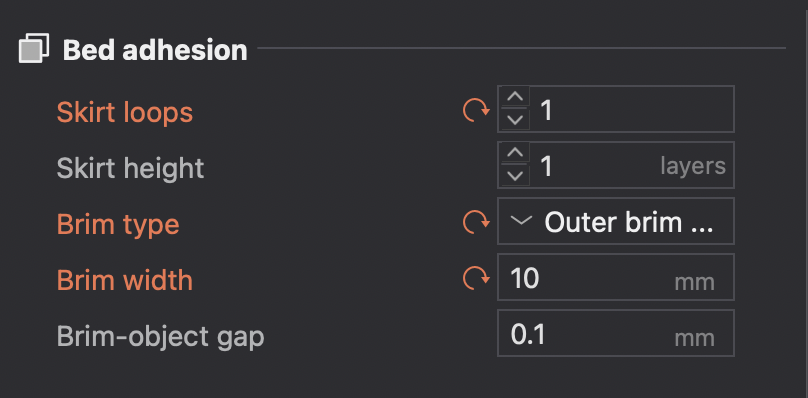
As PAHT-CF can be quite difficult to print as it tends to warp, follow instructions below and do some tests before printing all parts :
- Dry the filament for at least 12 hours before starting to print
- Use textured plate to improve adherence
- Print pieces one by one
- Add at least one bed adhesion layer
Use your favorite slicer to load the .stl files and print them separately with the instructions mentioned above
INFO
If you use Bambu Studio, you can also directly import the .3mf files containing all the essential parameters of the project
Laser cutting pieces
The folder also contains box_V1.svg and box_V1.dxf files.
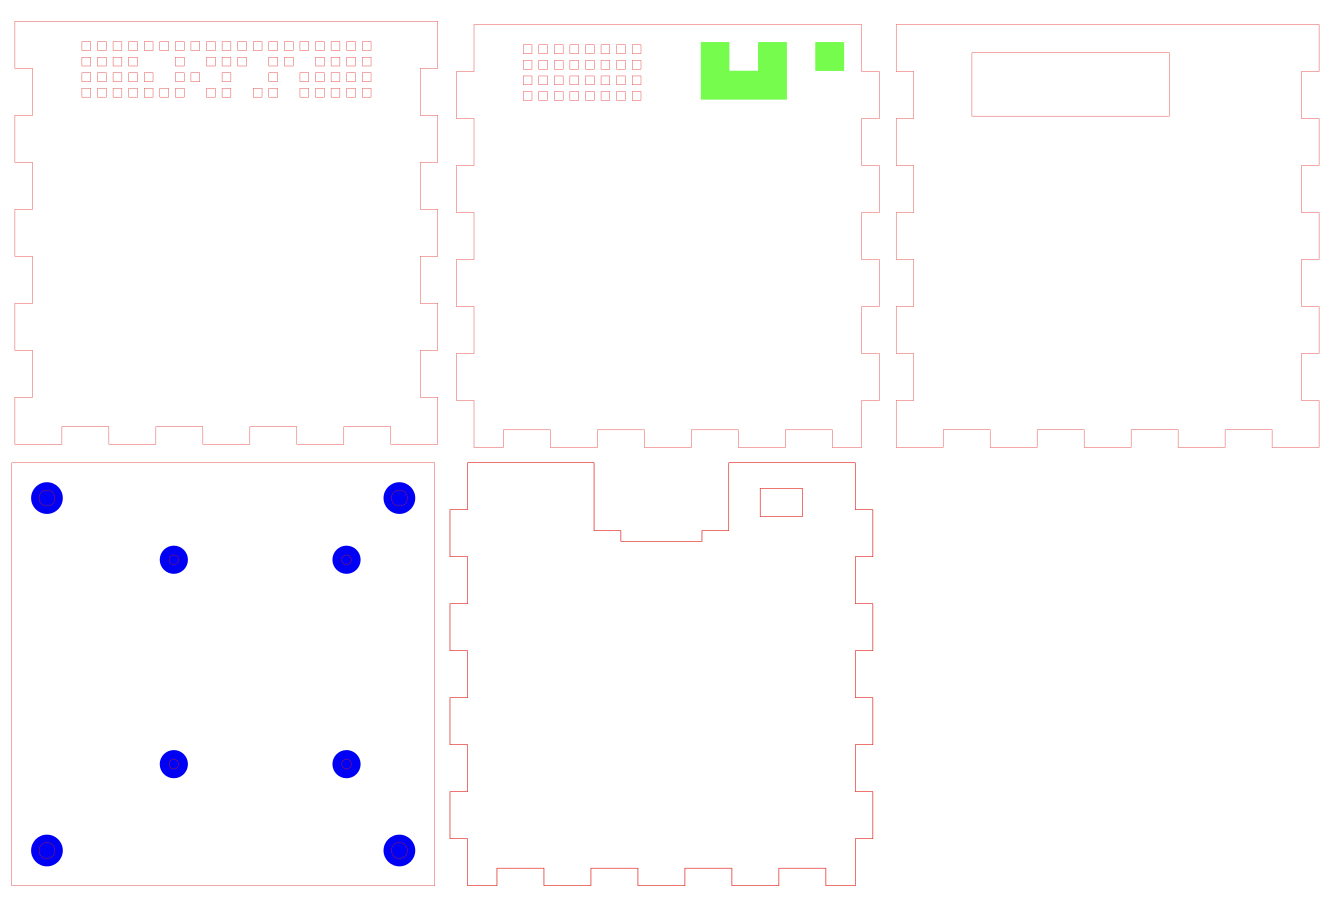
The file has to be opened with a vector graphics editor (e.g. Inkscape), then sent to the laser cutting machine software and edited with the following parameters :
- Red color : cutting (plywood 5mm)
- Green color (optional logo) : wood engraving (less than 1mm)
- Blue color : wood engraving (~1.5mm for screw heads, not more than 2mm)
INFO
As laser cutting parameters will depend on the machine and the wood you use, we strongly recommend you to do some tests before printing the entire parts. As an example, here is engraving parameters used with an Epilog FusionPro :
- Blue engraving :
- Resolution : 600
- Speed : 50%
- Power : 100%
- Passes : 3
- Red engraving :
- Resolution : 600
- Speed : 100%
- Power : 100%
- Passes :
Preparing pieces
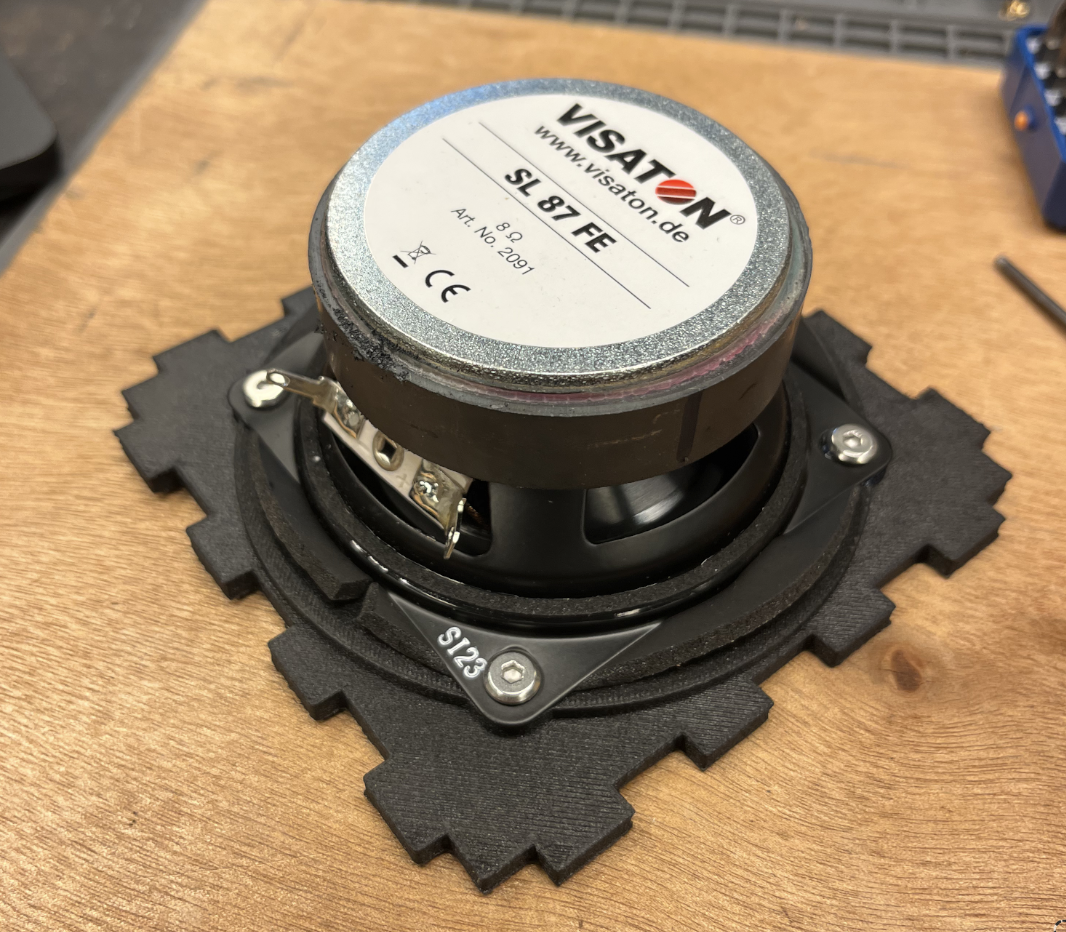
Then, we have to fix our speaker to the front face (face 1) :
- Fix the 4 M4x4 heat-set inserts using your soldering iron :

- Apply the speaker ring foam
- Put some thread lock inside the 4 threadings
- Present the speaker and tighten the M4x5 screws
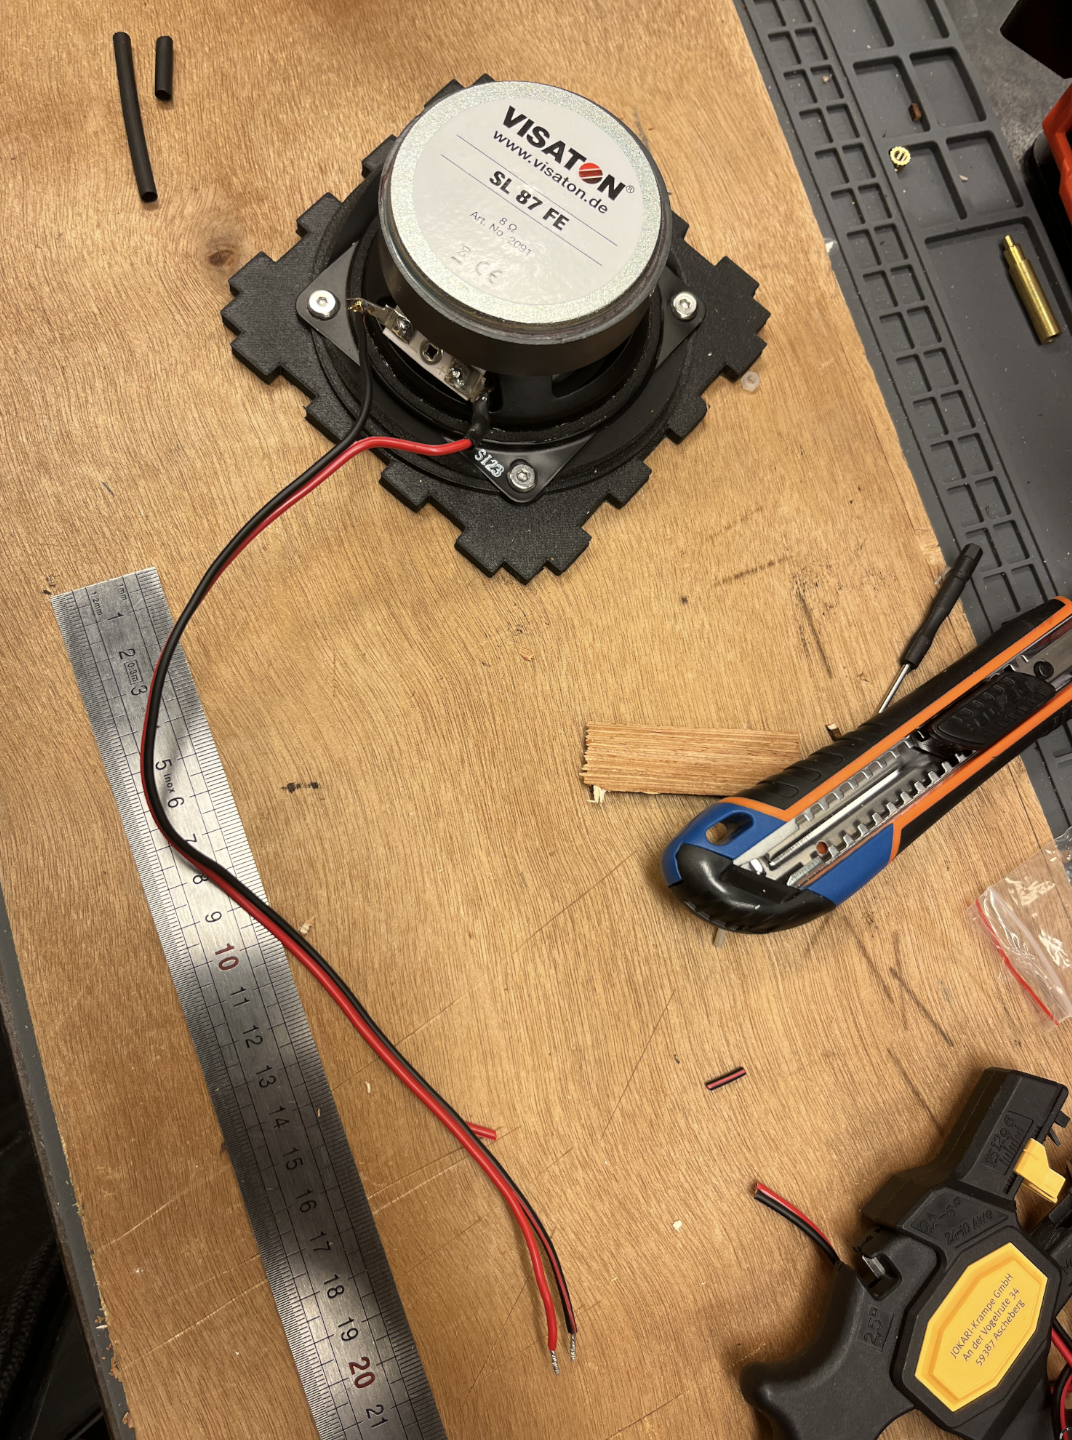
- Prepare a 30cm long speaker cable, strip the ends and weld it to the speaker (optionally add heat shrink tube to protect the welds):
And that's it! All the pieces are manufactured and prepared to be assembled.