Creating a project
A dotpi project is shared among a fleet of Raspberry Pis and allows you to configure different systems such as the type of soundcard, WiFi, or SSH key. Once created, you can install a project on several Raspberry Pis.
Project directory
First, you need to create a directory for your dotpi projects. This will be a collection of projects. Choose a convenient directory - for e.g. Documents - and create a new one with the mkdir (for "make directory") command:
mkdir -p ~/Documents/dotpi-projectsEverytime you use dotpi-tools, be sure to use this directory. To go to the directory, use the cd ("change directory") command in the terminal:
cd ~/Documents/dotpi-projects/Creating a new project
Now that you're in the proper directory, create a new project using the dotpi-tools wizard:
cd ~/Documents/dotpi-projects/
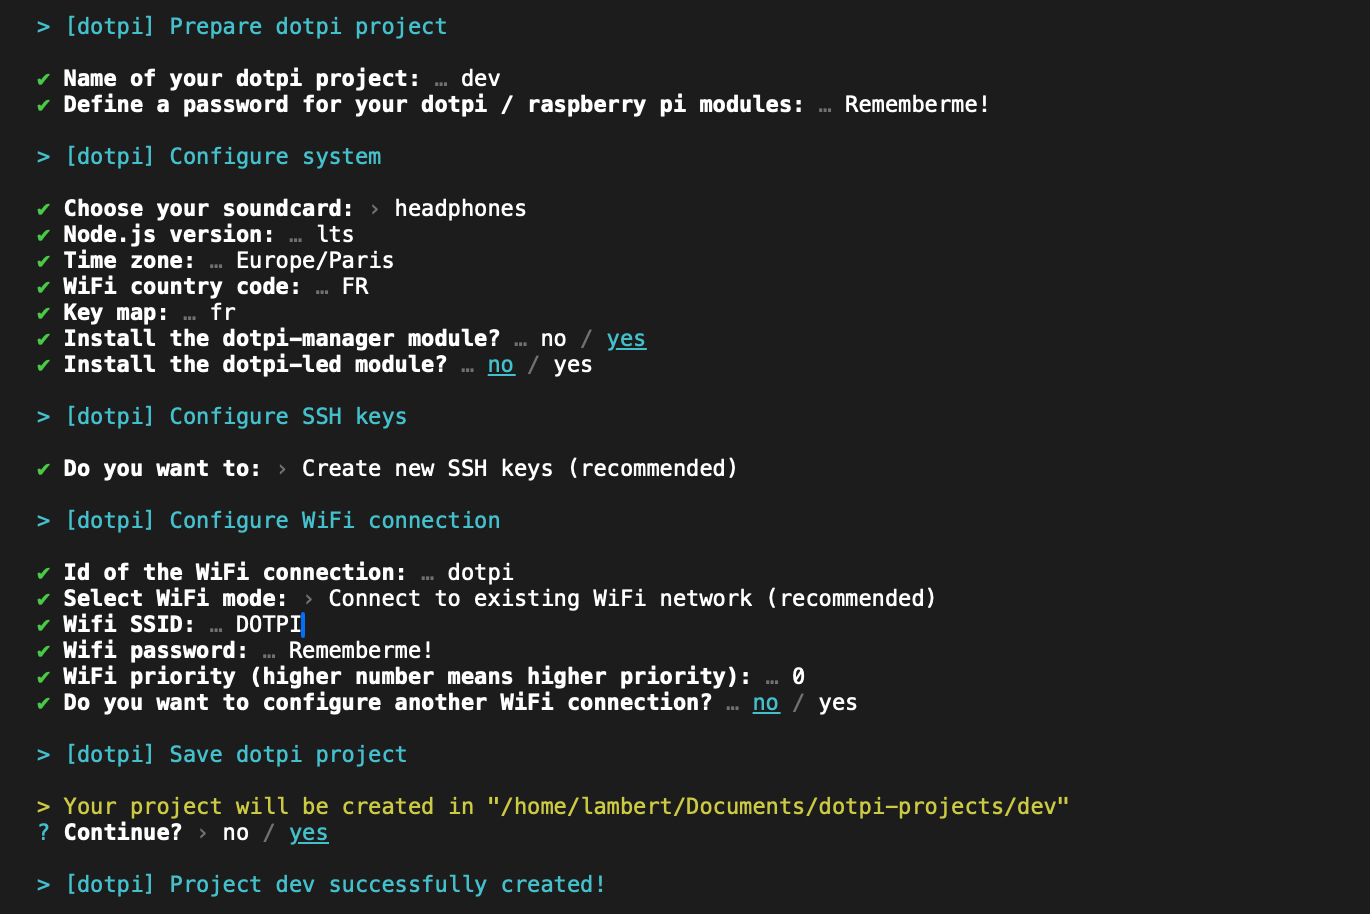
dotpi-tools --create-projectYour terminal should look like the following:

Then, follow the wizard. It will allow you to configure systems (soundcard, WiFi, keyboard, SSH, etc.) and install some modules (dotpi-manager). Press Enter to accept default options, or type a new value and confirm with Enter.
It is recommended to generate and install SSH keys for the new project.

Your project is now ready to be installed on a Rasberry Pi.
